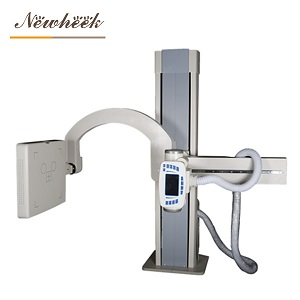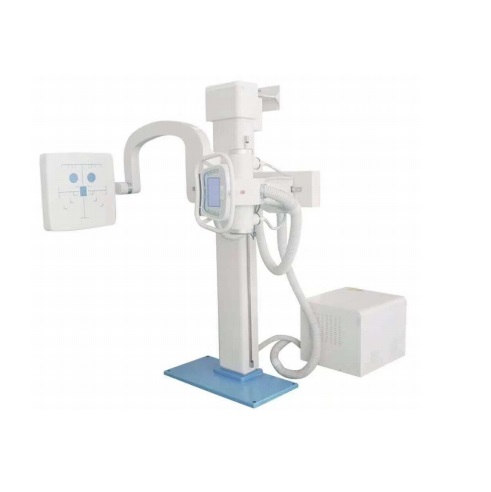

ment is the product. The vertical column travel, the arm rotation, the telescoping tube-to-detector distance — each is a mechanical interface with bearings, brakes, cables, and detents that wear with use.
Three consequences follow:
None of this makes U-arms fragile. It makes them serviceable: a team that measures the right things monthly keeps a U-arm sharp for its full working life, and a team that doesn’t usually pays for the same drift through repeat exposures and emergency calls.
The collimator’s light field must match the actual X-ray field. On a U-arm this congruence is the first casualty of any knock to the tube head. The classic check uses a film or digital exposure of the light-field corners: expose, measure the offset between the light-defined corners and the exposed field edges, and compare against your baseline. Small misalignment is a calibration task; growing misalignment between months is a mechanical question worth a service call.
Rotate the arm through its working arc to a wall-bucky position and a table position, then back. The central ray should return to the same point on the detector. If your system supports auto-tracking, test that too — and separately. Auto-tracking that lands a few millimeters off will quietly generate repeat exposures at exactly the views you shoot most. (For a deeper look at how tracking behaves, our article on tube-to-bucky auto-tracking covers the mechanics.)
Open and close both blades through their full range while watching the light field. Blades that move unevenly, stick, or fail to close fully point to collimator problems that will show up as cropping errors and unnecessary dose. If your collimator needs attention beyond cleaning and calibration, the X-ray collimator for U-arm machines product page is the right starting point for a replacement conversation.
With the arm at working height, apply firm hand pressure in several directions. The column should not sink, swing, or rotate. Brakes that pass the hand test in month one can soften by month six; catching that during a monthly check is a five-minute adjustment, while catching it during a trauma case is a safety event. Check the emergency stop at the same time — press it, confirm motion stops, reset it.
With a uniform phantom or even a water phantom at a fixed position, make several identical exposures using manual technique and record the detector exposure index. The numbers should cluster tightly. If your system has automatic exposure control, repeat the test in AEC mode — AEC chambers and their calibration are a classic slow-drift item, and a rising spread in readings is visible months before anyone complains about inconsistent images.
Every month, review the phantom images from the repeatability test for uniformity and artifacts before you file them. Dead lines, new blotches, or a shading pattern that wasn’t there last month deserve documentation with the image attached. Then apply one rule of thumb: artifacts that appear at every arm position and preset point toward the detector or the image chain, while artifacts that follow the arm’s geometry point toward the tube-collimator chain — and that distinction decides who you call first.
The cheapest sensor in the room is the operator’s ear. New grinding, clicking, or a change in how the column travel feels under hand pressure are early warnings that precede measurable geometry errors by weeks. Make “anything sound or feel different?” an explicit question in the monthly log — answers get written down, and written answers form a trend.
| # | Check | Tool | Pass criterion |
|---|---|---|---|
| 1 | Visual + audible inspection at working height | None | No new noise, no visible damage, brakes hold firm |
| 2 | Light field / radiation field congruence | Test object or corner-mark method | Within your baseline tolerance, and not worse than last month |
| 3 | Rotation repositioning to wall bucky and table | Dry run + detector test exposure | Central ray returns to baseline position |
| 4 | Collimator blade full travel | Visual | Smooth, symmetric, full closure |
| 5 | Repeatability exposures (manual, then AEC if fitted) | Uniform phantom | Exposure indices cluster tightly; no trend month-over-month |
| 6 | Emergency stop and motion cut-off | Function test | Stops immediately, resets cleanly |
| 7 | Log review and trending | QC notebook or spreadsheet | All values compared with baseline, anomalies flagged |
The routine fits in a coffee break. What makes it work is not the individual checks — it is the log. A QC notebook that records the numbers, the date, and the initials turns a subjective “feels fine” culture into a trend line your service engineer can read in thirty seconds.
Between monthly routines, the operator’s shift-start habit carries most of the load:
This is not a paperwork exercise. It is the same instinct a driver applies to a vehicle they rely on daily — and on most days it is the only QC the system will get.
A workable division of labor for most facilities:
Local regulations define who may perform which measurement in your jurisdiction; the division above is about workflow, not compliance, and it slots into whatever framework applies to you.
Every constancy routine is a comparison, and comparisons need a reference. The day your U-arm is accepted — installed, calibrated, and signed off — record the baseline: congruence offset, repositioning positions, repeatability exposure indices, and the feel tests. If the system was never baselined, the best time to create a working reference is the next service visit; ask the engineer to record the same numbers after calibration and start the log from there.
Acceptance is also when the paperwork trail matters most. The documents a U-arm system should ship with — including test records and conformance statements — are covered in our guide to U-arm compliance files; keep the acceptance test report with them, because it is the reference document every future constancy number will be compared against.
Three patterns justify a call before the next scheduled visit:
When you call, the log is the message: dates, numbers, and the trend. Engineers equipped with a three-month history diagnose in one visit what would otherwise take two — and rooms come back online days sooner.
A monthly in-house routine covering the seven checks above fits most facilities’ workload and catches typical drift early. Annual physics surveys and any intervals your local regulations require sit on top of this; the monthly routine does not replace them.
Most of the routine needs nothing beyond a phantom (or a uniform water container), a tape measure, and the log. Light-field congruence checks work with a corner-mark method on your own detector. Specialized test tools raise precision but are not what catches most drift month to month.
It adds one test: verify that tracked repositioning lands at the baseline central-ray position in both wall-bucky and table modes, tested separately from manual presets. Auto-tracking is a common source of small, silent errors — and because it handles your most-used views, its drift shows up directly in your retake rate.
In practice: geometry drift (alignment and repositioning errors), collimator light-field mismatch, and technique-chart assumptions that no longer match the machine’s actual output. A monthly log usually identifies which of the three is active within one or two cycles.
Yes — indirectly but reliably. A documented trend lets the service engineer arrive with the right parts and the right hypothesis, collapsing multi-visit diagnoses into one visit. It also protects your warranty position by showing the system was operated and maintained as intended.
Planning a new U-arm installation, or want the acceptance-baseline checklist our engineers use? Contact us:
Email: admin@newheek.cn
Phone/WhatsApp: +86 19062611512 (WhatsApp chat)
Or leave a message via our contact page — tell us your system type and workflow, and we will help you build the QC routine around it.
Tel: +86 19062611512
Email : admin@newheek.cn
Company : Weifang Newheek Electronic Technology Co., Ltd.